Windows and macOS are the two most popular desktop operating systems till to now. A Windows 10 bootable USB comes does a great help in a variety of situations. Whether you're doing diagnostics, system repairs or even on clean install, it's much more convenient to have a USB drive rather than a physical disk, which can get damaged more easily. However, when one of your Windows computer got crashed or couldn't boot as normal, how to create a Windows bootable USB if you only granted access to a Mac computer?
This sounds crazy but the truth is that it is not that hard as you imaged. In this short tutorial, we will show 3 different tools to create a Windows 10 bootable USB on a Mac computer. All of the recoomended methods are working perfectly on macOS Big Sur, Catalina, Mojave, High Serria, Serria and OS X EI Capitan.
Table of content:
Method 1: UUByte ISO Editor without Boot Camp (Super Easy)
Method 2: macOS Boot Camp Assistant App
Method 3: Build a Windows 10 Virtual Machine
Method 4: Text Command with Terminal Utility (More Challenging)
Boot Camp Assistant is the official app to make a dual boot on a Mac computer. It is supposed to be the first tool to be shared in this post. But after several attempts and according to online feedback, it is not the ideal solution any more because the success rate is so low. Instead, we will use UUByte ISO Editor for Mac in this part, which is the perfect tool for this job because it gives you tremendous flexibility.
For example, if you have a Windows 10 installation ISO, you can easily extract it using this software and then create bootable media on a USB stick. Alternatively, you can get the ISO file from Microsoft's website and create a bootable Windows 10 USB with built-in burning tool . In case you need to make specific changes to the ISO file before creating the media, the software will allow you to edit, rename, add and remove content from the ISO file.
UUByte ISO Editor for Mac is able to handle ISO files natively on a computer running Mac OS X or macOS. It also means you can easily create a Windows 10 bootable USB on Mac. That's normally a very tough task since Apple uses the DMG format instead of ISO and doesn't offer extensive tools for ISO manipulation. With that, let's get into the process:
Download Now Download Now
Step 1: Download a copy of Windows 10 ISO on Mac and insert an USB flash drive (over 8G Storage). The data on the drive will be wiped, so it's better to take a back up of data on it.
Step 2: Download .dmg file of UUByte ISO Editor and drag the app icon to Application folder so you can UUByte ISO Editor app from Launchpad.
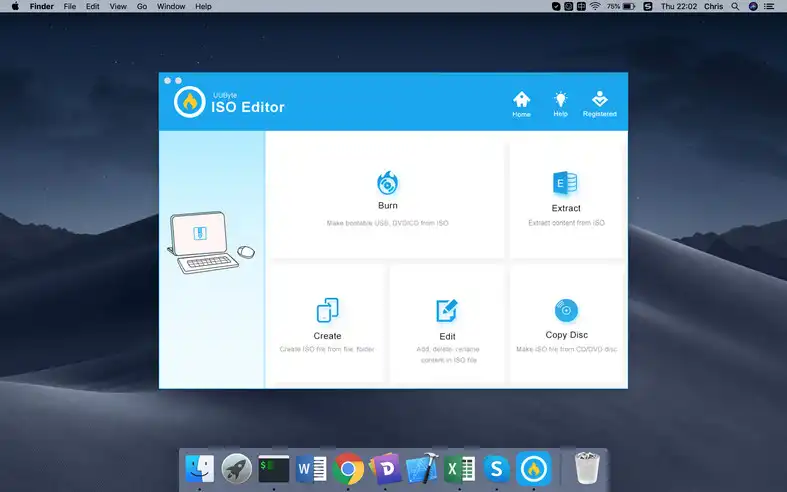
Step 3 : Select the Burn module in the home screen and import Windows 10 ISO into the program. Then pick up the USB drive name. Click the Burn button, and a Windows 10 bootable USB will be ready in a jiffy.
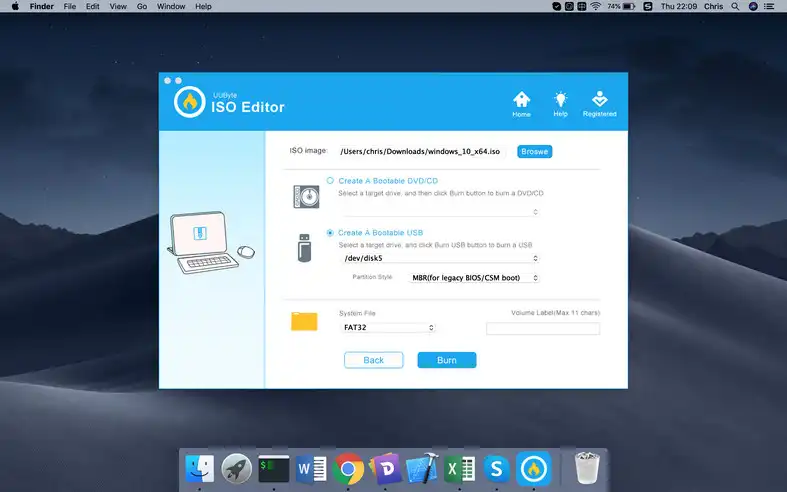
This is the safest and most reliable way to create Windows 10 bootable USB on MAC. There are also other methods that you can try, three of which are described in subsequent sections But no one could be easier than this useful app.
Download Now Download NowBoot Camp Assistant, or Boot Camp for short, is another good way to create Windows 10 bootable USB on Mac. This could be our first choice for creating bootable Windows 10 USB on Mac but it has too many errors and get a lot of complaints from users. To avoid wasting your time with this app, we recommend UUByte ISO Editor at our first section.
However, no one could ignore this app when it comes to this subject. In fact, you can also install Windows on your Mac with dual boot by using Boot Camp app. But in this part, we will focus on the function that allows it to create a bootable USB from Windows 10 ISO file. The process is outlined below:
Step 1: Insert a USB drive with 8GB of space and launch Boot Camp Assistant on your Mac.
Step 2: On the startup Windows, click on Continue. A few seconds later, a new window pops up and saying "The startup disk doesn't have enough space to be partitioned ." Just ignore the warning and click OK to proceed.
Note: You will also see a checked box that's greyed out. This is automatically selected so the Boot Camp drivers and Windows support files can be downloaded from Apple's servers. These files and drivers will allow your Mac hardware to communicate properly with the Windows OS installation. They are only required if you plan to create a dual-boot with Windows 10 and macOS on your Mac computer.
Step 3: In the next page, you need to add Windows ISO file, which is automatically imported to Bootcamp. If you don't, or if you want to make sure it grabs the correct ISO, click on Choose?? and select the right one in the Finder window that opens. The destination drive should be your USB drive. Click Continue to create the bootable media.
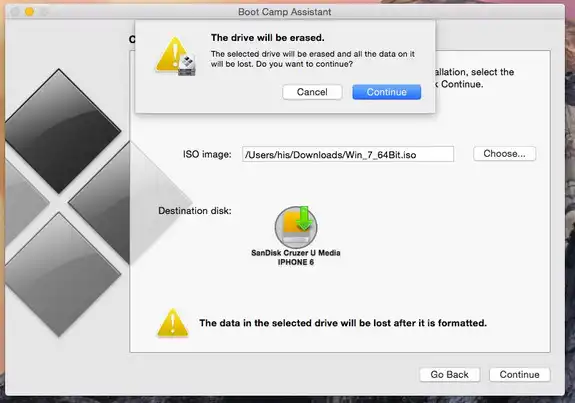
Step 4: Once the bootable USB being created, the USB drive will be renamed to WININSTALL. It will be mounted on your Mac, so eject it before removing it. This is now your Windows 10 installation USB. Recently, users have started complaining about this method not working because of the size of Windows 10 installation files. If you have that issues with Bootcamp, please use the first method above. There is also another method you can use, as described below.
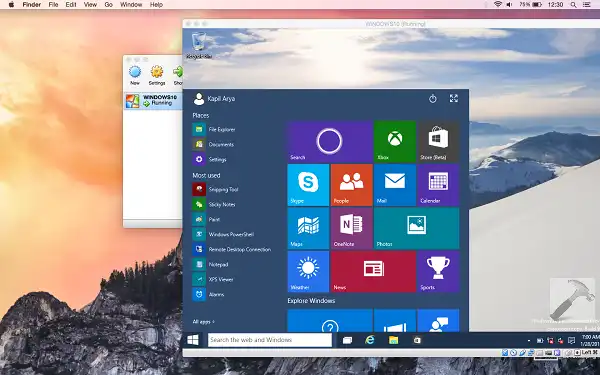
To be honest, there are dozens of ISO burning tools available on Windows platform. And most of them are free! This makes totally possible for building a Windows virtual machine on Mac and starts to create Windows 10 bootable USB in a virtual machine. In this section, we will use the free software Virtualbox for this purpose.
VirtualBox is a free and cross-platform virtualization software that can run a guest OS on the host computer. That means you can run a Windows 10 instance as a virtual machine on Mac computer thanks to virtualization technology. It is a bit complicated to get started but it is a proven solution to create a Windows 10 bootable USB on Mac.
Step 1: Download the Mac version of VirtualBox from its official website. And install the app on Mac.
Step 2: Go to the download page for Windows 10 ISO file and select the version of Windows 10 ISO you need to download. Select the language and hit Confirm. Now choose the architecture (32-bit or 64-bit) and click on the corresponding button.
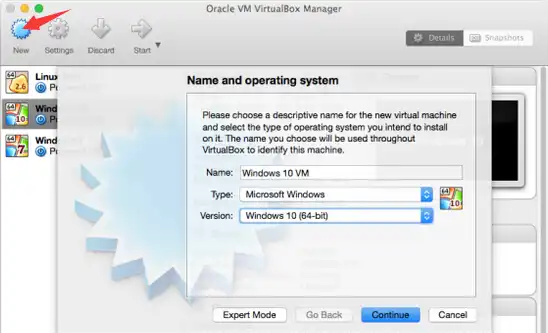
Step 3 : Start VirtualBox and follow the wizard to create a Windows 10 virtual machine.
Step 4: Copy the Windows ISO file to USB and boot the virtual machine from USB. Now, move the mouse into the guest OS and you are now in a Windows environment. And the USB should be detected by the guest machine.
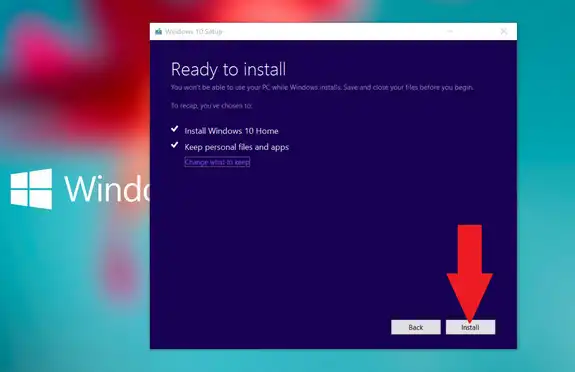
Step 5: Open Internet Explorer and download Windows Media Creation Tool. Accept the End User Licensing Agreement or EULA and choose Create Installation Media for Another PC. Click on Next.
Step 6: Confirm the Windows 10 version, click on Next and select your USB drive. Click Next to create the bootable media.
Step 7: This USB stick can now be used to clean-install Windows 10 on any other PC. This is not a fail-proof utility for burning ISO to a USB drive, so if you're seeing any errors during the process, we recommend you go back and use Method 1, which is far more reliable and has a 100% burn success rate.
Terminal is a built-in app in modern macOS and acts as a Utility replacement. It's basically a command line interface that gives you a complete control over your Mac. However, you need to get a hang of its basic commands and functions, which may take some time. In this case, you can use the Terminal app to create bootable Windows 10 USB on macOS Big Sur. Here is how.
Step 1: Download the Windows 10 ISO image file and then insert a USB drive or disk into your Mac computer.
Step 2: Next up, open the Terminal app on your Mac. You can trigger the Terminal app by using Spotlight.
Step 3 : Once the Terminal app launches into its user interface, enter the following command (diskutil list external) and you should see the list of all external disks that are now attached to your Mac. In the following screenshot, disk3 is the identifier of inserted USB drive.
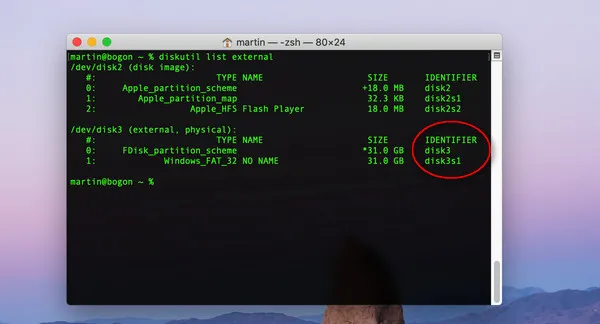
Step 4: Locate your USB drive from the returned output and then format your inserted USB drive or disk to MS-DOS. This step is to give that USB drive the ability to store Windows OS partition. You can use this command to format USB drive:
diskutil eraseDisk MS-DOS "WINDOWS10" GPT disk3
Step 5: Double click the name of Windows 10 ISO file to mount it on Mac. You will see the mounted name in Finder left sidebar.
Step 6: Now, copy all the files within the mounted folder to your inserted USB drive or disk by running the following command:
cp -rp /Volumes/COCOMA_X64FRE_EN-US_DV9/* /Volumes/WINDOWS10/
Note: COCOMA_X64FRE_EN-US_DV9 in the command line is the mounted name of your Windows 10 ISO. WINDOWS10 is the name of USB drive you set in Step 4.
Once you are done, your inserted USB now contains bootable Windows 10 USB installer. You can install it on any device.
To download Windows 10 ISO image, the only legal source is via Microsoft official website. Currently, you will only get Windows 10 20H2 v2 (5.8GB) from Windows 10 download page. According to our research, there is a big issue with latest Windows 10 release (20H2) as install.wim file in ISO image is larger than 4GB and it is not able to save it on USB drive formatted by FAT32. You have to format the drive to exFAT or split the install.wim file into small parts with wimlib library in Terminal.
brew install wimlib
wimlib-imagex split /win10-image-path/sources/install.wim /Volumes/USBNAME/sources/install.swm 3000
If the above process was too complicated for you, another possible solution is to use an old version of Windows 10 (e.g. 201803), which file size is less than 4.5GB. You can go with any of the above methods and no problem with that.
We have tested all the 3 piece of software and UUByte is the one that takes less time (around 20min) to make a Windows 10 bootable USB without any error. For Boot Camp Assistant, two of USB drives are not recognized by the app. So the success rate is pretty now. The VirtualBox suggestion also works great but takes around 2 hours to complete the task.